We recommend watching this video tutorial so you can see How to Add a Branded Video Background in Microsoft Teams in action.
You can also read our written tutorial below.
Video Transcript
Intro
Hi there! I’m Christa with Fixed Fee IT, Portland Oregon’s best IT support. Welcome back to our series on How to Use Microsoft Teams. Today’s tutorial walks through how to create and add a branded virtual background in Teams.
If you’re looking for a specific section of this video, hover over the progress bar and select the part you need. Otherwise, let’s get started…
One of the great things about Teams is the little custom touches you can add. When you are speaking with a potential client or working with a vendor, you have the option to add a custom image as your video background, instead of simply blurring your current background, or not setting one at all.
To complete this tutorial, you are going to need to have an image on hand that you want to use as a video background. To get one customized with your company logo and visuals, we suggest reaching out to your marketing team, or to a graphic designer to set you up with images that suit your business.
Today, we are using one of Fixed Fee IT’s custom background images.
To start, we will open Microsoft Teams. From there, we are going to start a Teams Meeting. At this time, to change your video background you must either be in a Teams Meeting or about to go into one.
We are going to start a meeting with our coworker Caitlin.
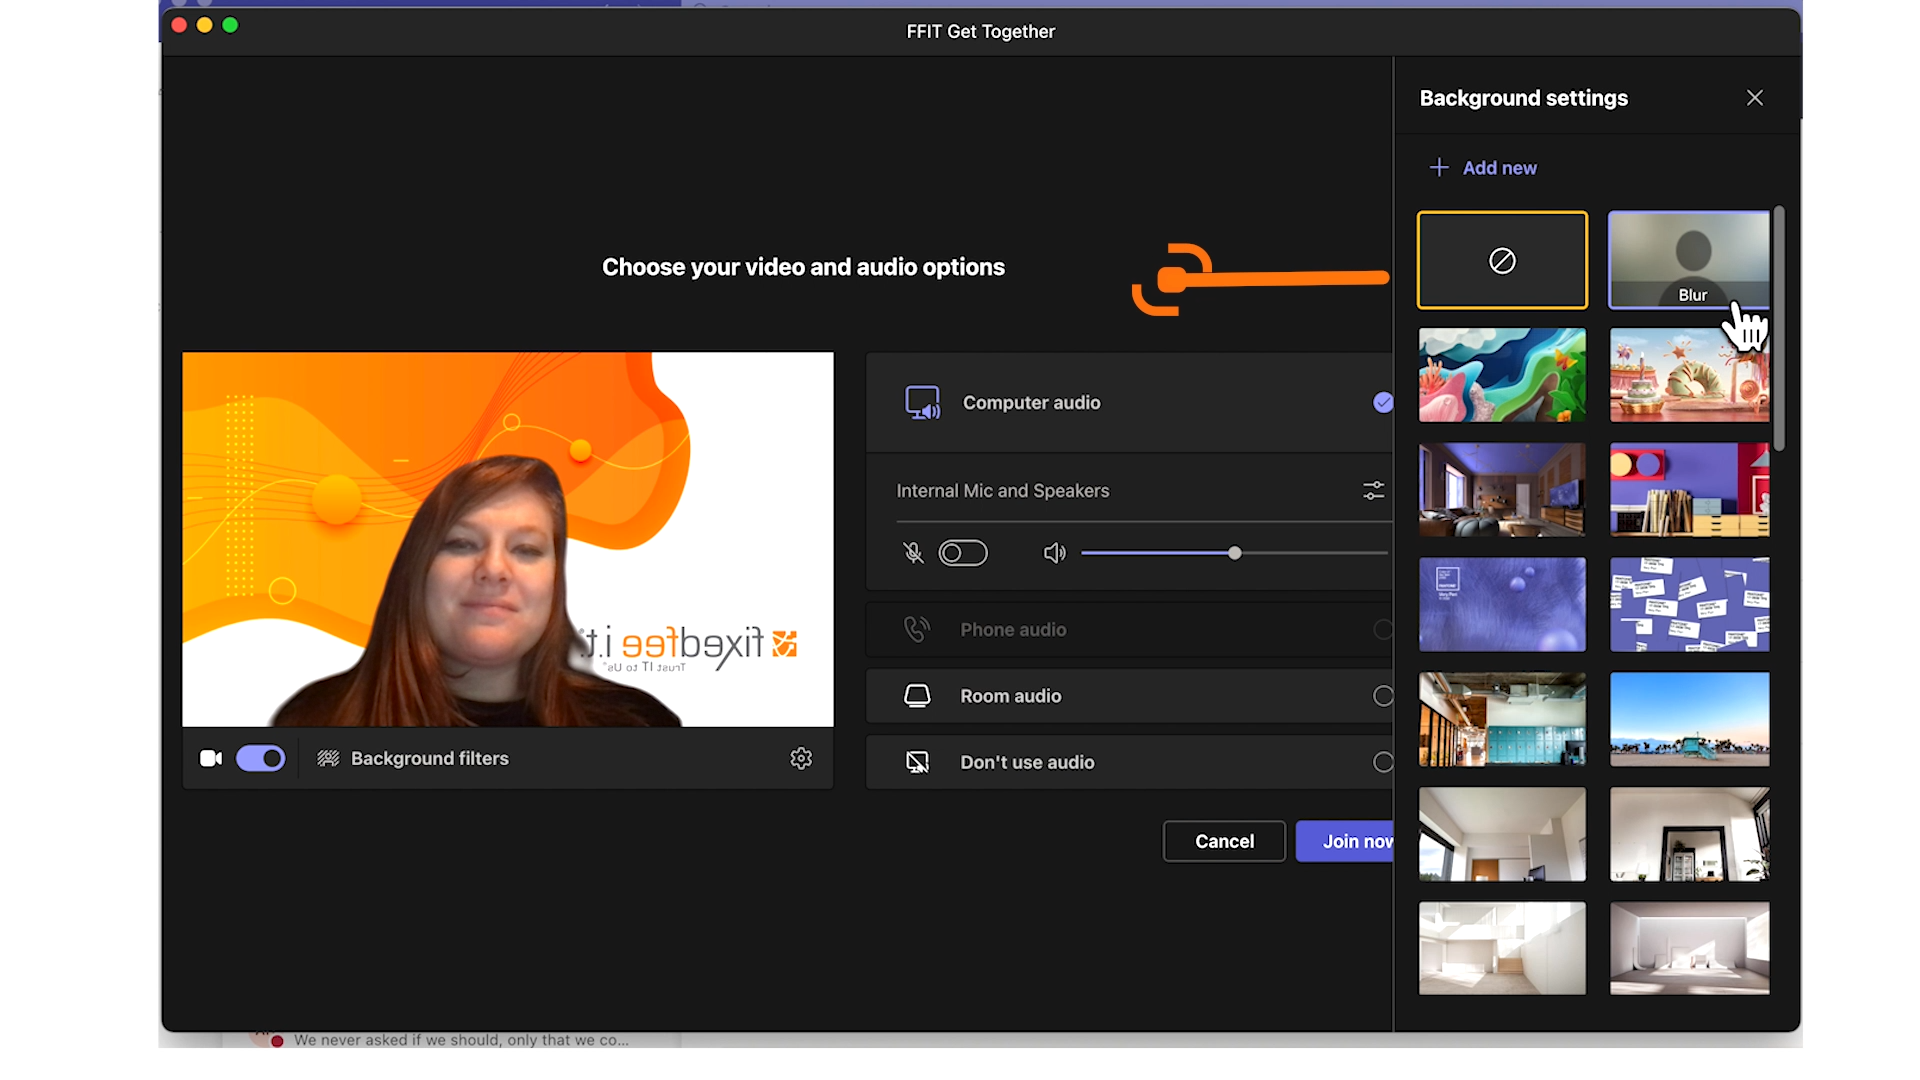
You can see here that our video options will appear before we go into our meeting. To open our settings, we are going to click the switch between the video and microphone options. This is your background option, and it will make your background settings panel appear on the right hand side.

Once in the background settings, you will have options to blur your current background, select an image from Microsoft Team’s premade background images, or add a custom image.
To upload our custom background image, we are going to select the add new option.
Once your image is uploaded, select it as your chosen background image and choose apply and turn on video.
You will now have the custom image as your background.
To change your background image during a meeting, select the three dot icon in the middle. From that menu, choose apply background effects. This will open the same background effects panel as before, where you will have the option to blur your background, use a premade background, or upload a custom background.
Keep in mind when you are changing your background your video will be off, so anyone you are talking to will not be able to see you until you have applied your chosen background.
And there you have it! Now you should be able to apply custom backgrounds to your Teams video meetings. Check out our other Microsoft Teams tutorials in our playlist to learn more. If you still have questions, feel free to reach out to our team at Fixed Fee IT. Thanks for watching!