")
We recommend watching this video tutorial so you can see How to Search in the Outlook Webapp in action.
You can also read our written tutorial below.
Video Transcript
Hi there! I’m Christa with Fixed Fee IT. Welcome to our series on everything you need to know about the Outlook Webapp. Today, we’re walking through how you can set your attachment preferences in the Outlook through the webapp. If you’re looking for a specific section of this tutorial, hover over the progress bar and select the part you need. Otherwise, let’s get started…
Intro
To start, we’re going to open Outlook in our browser. From here, you are going to click on your Outlook settings button, which is this gear here in the upper right-hand corner. This opens your Outlook settings.

From here, you are going to go all the way down to where it says view all Outlook settings. Clicking the link will open a new screen.
Mail settings should be automatically opened, but if they are not, you can select your mail settings via the column on the left-hand side. The next column, under layout, allows us to select the attachment settings.
You will see there are three options available to set your sharing preferences too. One will ask you how you want to share your attachments each time you send an email with an attachment.

One will always send your attachments as a One Drive Link. The last option will always send a copy of your attachment. What that means is that Outlook will make a copy of the file and send it to the recipient.
You can see that the same three options appear under attachments you share from a group file.
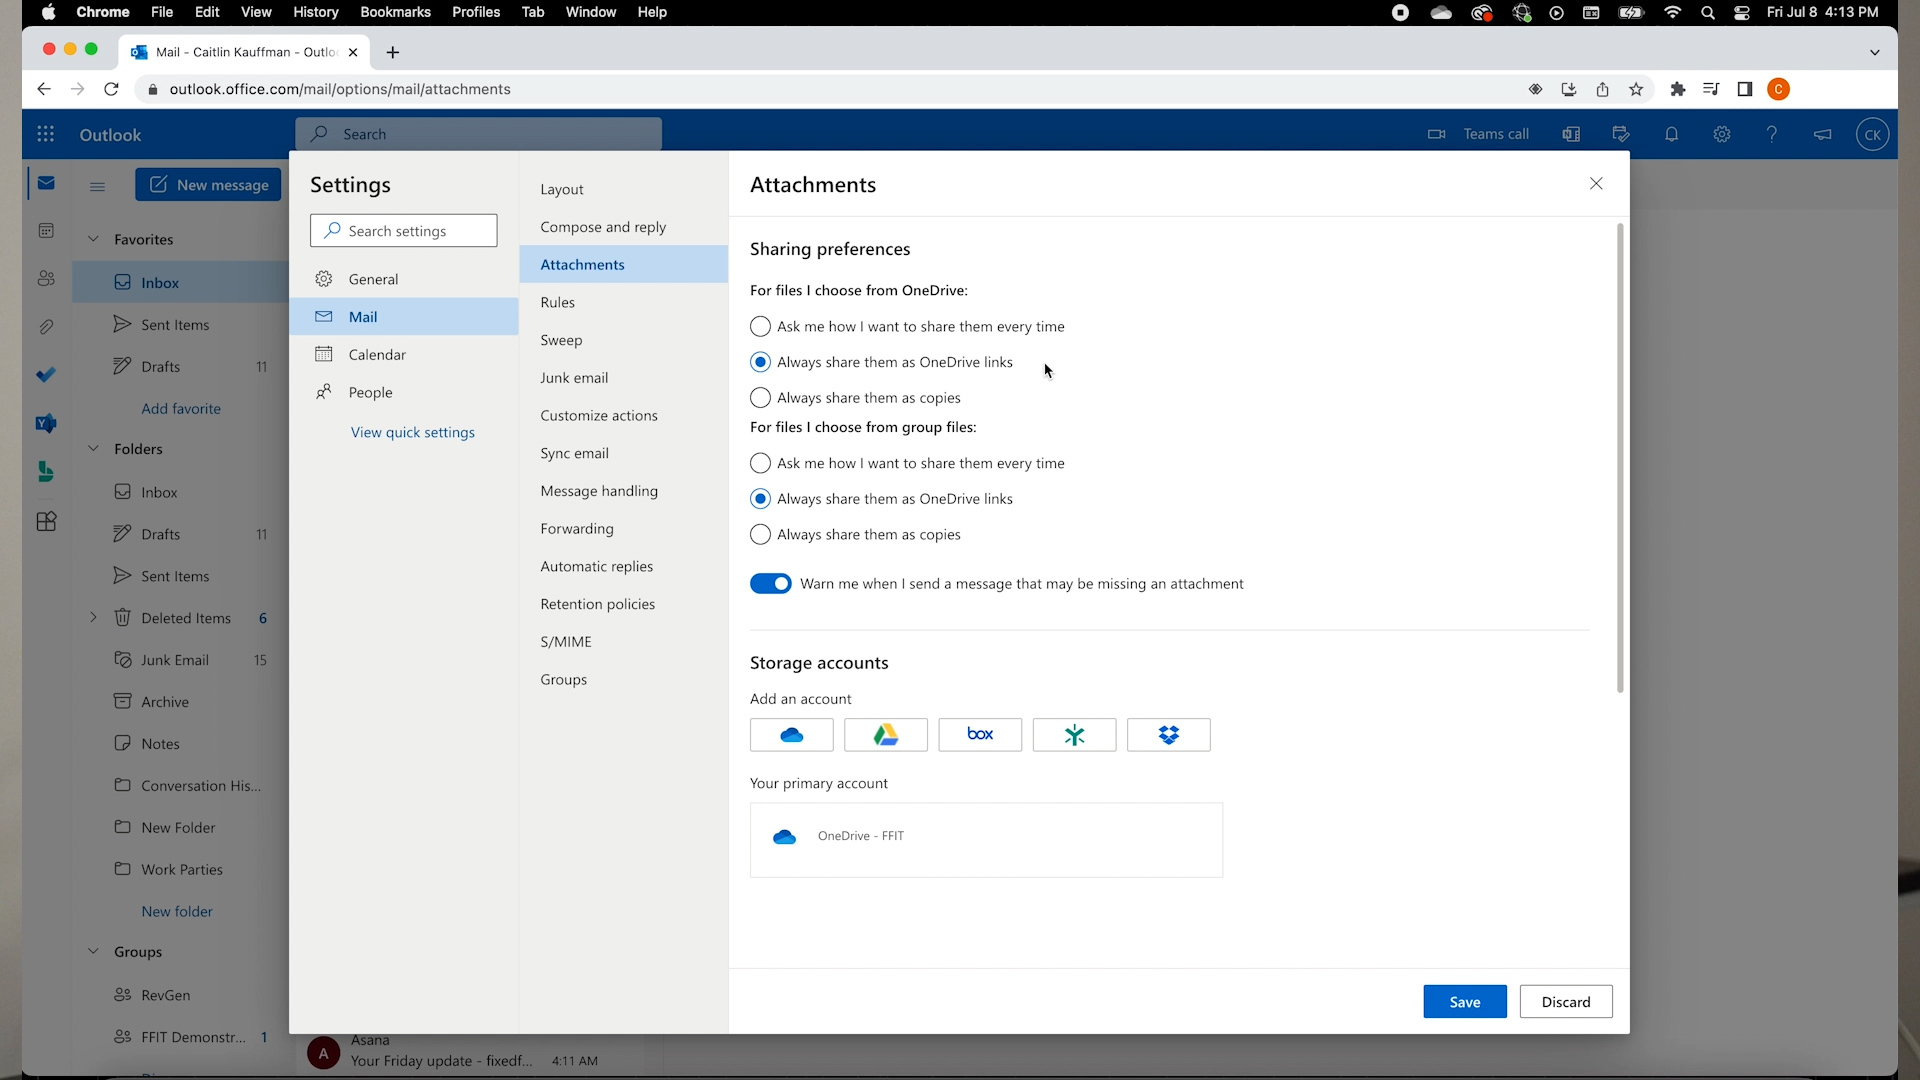
We want to change our sharing preferences so that all the documents we attach to our Outlook messages are always shared as a copy. Here we will select that option under files I choose from OneDrive, then again under files I choose from group files.
To save your changes, you are going to go down to the save button, click it, and then exit using the X at the top right.
And that’s all I have for you in this section. Now you should be able to send a message in the Outlook webapp. Check out our other Outlook Webapp tutorials in our playlist. If you still have questions, feel free to reach out to our team at Fixed Fee IT. Thanks for watching!


